 JDBC资源文件配置及Druid简单使用
# 1. Properties
 如果开始我开始使用的是 MySQL之后换成了 Oracle(一般的穷人用不起呀),那么所有涉及连接数据库的操作(加载驱动)都需要修改代码.
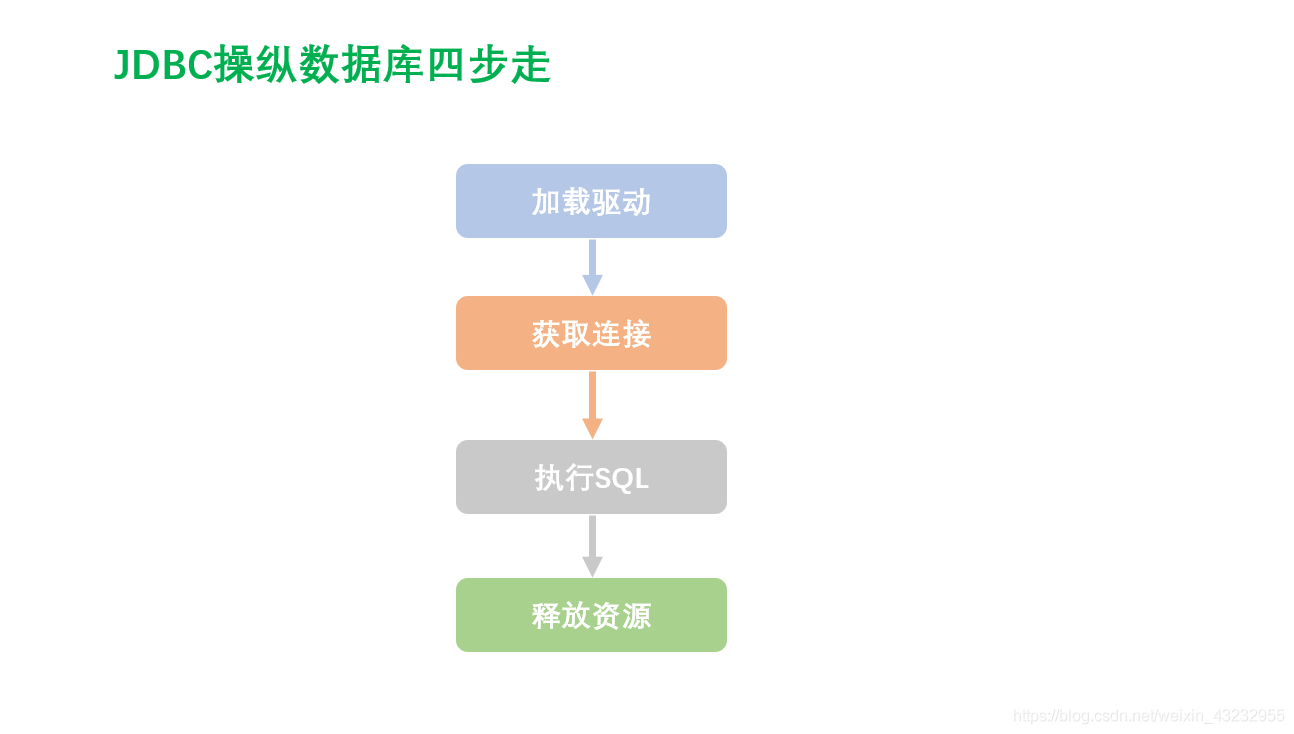
加载驱动,获取连接,释放资源 每次都需要重复的操作,所以我们将其封装到工具类中
那么,我们将这个类抽象出来,写成配置文件的形式. 将这些配置都放入到资源文件中,方便维护(有点类似于C语言中的 define定义的宏)
那么,这个配置文件是啥子哟?
我们得用到Properties
Properties类是什么?(来自灵魂深处的拷问??)

Properties是属性文件,是Hashtable的子类
Properties(Java.util.Properties),该类主要用于读取Java的配置文件,不同的编程语言有自己所支持的配置文件,配置文件中很多变量是经常改变的,为了方便用户的配置,能让用户够脱离程序本身去修改相关的变量设置。就像在Java中,其配置文件常为.properties文件,是以键值对的形式进行参数配置的
key = value
其实它就是resources下的资源文件,后缀为.properties

资源文件(.properties):
- 数据库驱动
- URL
- username
- password
我们把资源文件写到.properties的配置文件中,方便修改维护
db.properties资源文件
driverName = com.mysql.jdbc.Driver
url=jdbc:mysql://localhost/jdbc?charset=utf8&useSSL=false&allowPublicKeyRetrieval=true
username = root
password = 1234
2
3
4
 localhost 后面跟上数据库名称
# 2. JDBC的简单封装用资源文件配置
创建一个类的测试类(单元测试)

在 ==java== 文件下的 utils 包下新建 CommUtils,写完 CommUtils 之后,Ctrl + Shift + t自动生成测试文件
CommUtils:封装基础的工具方法(如加载配置文件,Json序列化)
==CommUtils下放的是共有的操作,与具体方法无关==
JDBCUtils: 封装JDBC操作的公共方法
# 实例Demo
CommUtils : 封装基础的工具方法(如加载配置文件,Json序列化)
package org.iqqcode.utils;

import java.io.IOException;
import	java.io.InputStream;
import java.util.Properties;

/**
 * @Author: Mr.Q
 * @Date: 2019-08-01 07:56
 * @Description:封装基础的工具方法(如加载配置文件,Json序列化)
 */
public class CommUtils {

    private CommUtils() { }

    /**
     * 根据指定文件名加载配置文件
     * @param fileNames
     * @return
     */
    public static Properties loadProperties(String fileNames) {
        Properties properties = new Properties();
        // 获取到当前配置文件夹下的文件输入流
        // 获取输入流步骤: 获取反射对象--->获取类加载器--->获取类加载器下所有的同目录文件
        InputStream inputStream = CommUtils.class.getClassLoader().getResourceAsStream(fileNames);
        // 加载配置文件中的所有内容
        try {
            properties.load(inputStream);
        } catch (IOException e) {
            e.printStackTrace();
        }
        return properties;
    }
}
2
3
4
5
6
7
8
9
10
11
12
13
14
15
16
17
18
19
20
21
22
23
24
25
26
27
28
29
30
31
32
33
34
CommUtilsTest : 测试CommUtils
package org.iqqcode.utils;
import	java.util.Properties;

import org.junit.Assert;
import org.junit.Test;

/**
 * @Author: Mr.Q
 * @Date: 2019-08-01 08:05
 * @Description:
 */
public class CommUtilsTest {

    @Test
    public void loadProperties() {
       String fileNames = "db.properties";
       Properties properties = CommUtils.loadProperties(fileNames);
       //System.out.println(properties);
        // 如果加载成功,则 url不为空
       String url = properties.getProperty("url");
       Assert.assertNotNull(url); //表示传入的对象不是空对象

    }
}
2
3
4
5
6
7
8
9
10
11
12
13
14
15
16
17
18
19
20
21
22
23
24
测试通过

# 3. 数据库连接池
DataSource(管理数据库的连接) : 数据源-----类比线程池(管理,复用线程)
当我们与数据库建立连接时,每执行都会通过Connection来连接数据库 -----就好比于new Threa()
每次在用完之后,就像线程一样都销毁;如果要再次使用的话,还得再次建立连接
如果同时连接数据库的用户很多,创建连接和销毁连接的开销就会非常大
频繁操纵的资源:
driverNameurluserNamepassword
如果频繁的操纵数据库时,这些就会频繁的创建再使用
所以我们可以把它放入到类似于线程池作用的数据库连接池中(前提是把驱动配置到资源文件中,就是db.properties和封装好的 CommUtils)
JDBCUtils : 封装JDBC操作的公共方法
package org.iqqcode.utils;

import	java.sql.ResultSet;
import	java.sql.Statement;
import	java.sql.DriverManager;
import java.sql.Connection;
import java.sql.SQLException;
import	java.util.Properties;

public class JDBCUtils {
    private static String driverName;
    private static String url;
    private static String userName;
    private static String password;

    // static code block,when the class load to Call once
    static {
        Properties prop = CommUtils.loadProperties("db.properties");
        driverName = prop.getProperty("driverName");
        url = prop.getProperty("url");
        userName = prop.getProperty("username");
        password = prop.getProperty("password");

        // 1.加载驱动
        try {
            Class.forName(driverName);
        } catch (ClassNotFoundException e) {
            System.err.println("加载数据库出错");
        }
    }

    // 2.获取数据库连接
    public static Connection getConnection() {
        try {
            return DriverManager.getConnection(url, userName, password);
        } catch (SQLException e) {
            System.out.println("数据库连接出错!");
        }
        return null;
    }

    /**
     * 3.关闭数据库资源操作
     * @param connection
     * @param statement
     * @param resultSet
     */
    public static void closeResources(Connection connection,
                                      Statement statement) {
        if (connection != null) {
            try {
                connection.close();
            } catch (SQLException e) {
                e.printStackTrace();
            }
        }
        if (statement != null) {
            try {
                statement.close();
            } catch (SQLException e) {
                e.printStackTrace();
            }
        }

    }

    // OverLoading
    public static void closeResources(Connection connection,
                                      Statement statement,ResultSet resultSet) {

        closeResources(connection, statement);

        if (resultSet != null) {
            try {
                resultSet.close();
            } catch (SQLException e) {
                e.printStackTrace();
            }
        }
    }
}
2
3
4
5
6
7
8
9
10
11
12
13
14
15
16
17
18
19
20
21
22
23
24
25
26
27
28
29
30
31
32
33
34
35
36
37
38
39
40
41
42
43
44
45
46
47
48
49
50
51
52
53
54
55
56
57
58
59
60
61
62
63
64
65
66
67
68
69
70
71
72
73
74
75
76
77
78
79
80
81
JDBCUtilsStatementTest : 测试JDBCUtils
package org.iqqcode.utils;

import org.apache.commons.codec.digest.DigestUtils;
import org.junit.Assert;
import org.junit.Test;

import	java.sql.PreparedStatement;
import	java.sql.Connection;
import java.sql.SQLException;

public class JDBCUtilsPreparedStatementTest {
    @Test
    public void testInsert() {
        Connection connection = null;
        PreparedStatement statement = null;
        try {
            connection = JDBCUtils.getConnection();
            String sql = "insert into user(username,password) VALUES (?,?)";
            statement = connection.prepareStatement(sql);
            statement.setString(1,"Sunny");
            statement.setString(2, DigestUtils.md5Hex("1234"));
            int effect = statement.executeUpdate();
            // 如果 effect == 1则插入成功(受影响的行数)
            Assert.assertEquals(1,effect);

        }catch (SQLException e) {
            e.printStackTrace();
        }finally {
            JDBCUtils.closeResources(connection,statement);
        }
    }
}
2
3
4
5
6
7
8
9
10
11
12
13
14
15
16
17
18
19
20
21
22
23
24
25
26
27
28
29
30
31
32
插入成功

我们如果频繁的操作driverName,url,userName,password,把它们放入==静态代码块==中是最
合适的,因为在加载配置,在静态代码块中只执行一次,加载好之后就不在重复加载了...
static {
        Properties prop = CommUtils.loadProperties("db.properties");
        driverName = prop.getProperty("driverName");
        url = prop.getProperty("url");
        userName = prop.getProperty("username");
        password = prop.getProperty("password");
        }
2
3
4
5
6
7
JDBC与DataSource的区别
JDBC:
- 加载驱动
- 获取连接
DriverManager.getConnection(); - 执行SQL
- 关闭资源
DataSource:
- 加载数据源
dataSource = (DruidDataSource) DruidDataSourceFactory.createDataSource(props); - 获取连接
datasource.getConnection(); - 执行SQL
- 关闭资源
# 4. Druid的简单使用
Druid是阿里爸爸的开源数据库连接池,据说其性能算是位于领先的水平,从连接的创建和销毁这个性能方面优于其它连接池,但是觉得和HikariCP,的速度比起来还是差点。但是两者各有好处,一个是扩展性比较优秀功能比较全,一个是速度比较块。
Druid是一个JDBC组件,它包括三个部分:
基于Filter-Chain模式的插件体系。
DruidDataSource 高效可管理的数据库连接池。
SQLParser
pom文件中导入所需 jar包
<!-- alibaba的Druid数据库连接池 -->
    <dependency>
      <groupId>com.alibaba</groupId>
      <artifactId>druid</artifactId>
      <version>1.1.13</version>
    </dependency>
2
3
4
5
6
driverClassName=com.mysql.jdbc.Driver
url=jdbc:mysql://localhost/jdbc?charset=utf8&useSSL=false&allowPublicKeyRetrieval=true
username=
password=
ilters=stat
initialSize=5
maxActive=30
maxWait=60000
timeBetweenEvictionRunsMillis=60000
minEvictableIdleTimeMillis=300000
validationQuery=SELECT 1
testWhileIdle=true
testOnBorrow=false
testOnReturn=false
poolPreparedStatements=false
2
3
4
5
6
7
8
9
10
11
12
13
14
15
driverClassName=com.mysql.jdbc.Driver
url=jdbc:mysql://localhost/jdbc?charset=utf8&useSSL=false&allowPublicKeyRetrieval=true
username=root
password=

#初始链接数,在连接池被创建的时候初始化的连接数
initSize=20
#最大连接池数量
maxActive=20
#最小连接池数量
minIdle=5

#超时等待时间
maxWait=60000

#指定连接属性
connectionProperties=useSSL=true;rewriteBatchedStatements=true
2
3
4
5
6
7
8
9
10
11
12
13
14
15
16
17
# 基于Alibaba DruidDataSource
DruidUtils
package org.iqqcode.DataSource;

import java.sql.Connection;
import java.sql.ResultSet;
import java.sql.SQLException;
import java.sql.Statement;
import java.util.Properties;

import com.alibaba.druid.pool.DruidDataSource;
import com.alibaba.druid.pool.DruidDataSourceFactory;
import com.alibaba.druid.pool.DruidPooledConnection;
import org.iqqcode.utils.CommUtils;


/**
 * @Author: Mr.Q
 * @Date: 2019-08-01 10:23
 * @Description:基于Alibaba DruidDataSource
 */
public class DruidUtils {
    private static DruidDataSource dataSource;

    // 注册驱动,相当于创建数据库的连接池
    static {
        Properties props = CommUtils.loadProperties("datasource.properties");
        try {
            dataSource = (DruidDataSource) DruidDataSourceFactory.createDataSource(props);

        } catch (Exception e) {
            System.err.println("获取数据源失败!");
        }
    }

    // 获取连接
    public static DruidPooledConnection getConnection() {
        try {
            return dataSource.getConnection();
        } catch (SQLException e) {
            System.err.println("获取连接失败!!");
        }
        return null;
    }

    // 释放资源
    public static void close(Connection connection,
                             Statement statement) {
        if(connection != null) {
            try {
                connection.close();
            } catch (SQLException e) {
                e.printStackTrace();
            }
        }
        if (statement != null) {
            try {
                statement.close();
            } catch (SQLException e) {
                e.printStackTrace();
            }
        }
    }

    public static void close(Connection connection,
                             Statement statement, ResultSet resultSet) {
        close(connection, statement);

        if (resultSet != null) {
            try {
                resultSet.close();
            } catch (SQLException e) {
                e.printStackTrace();
            }
        }
    }

}
2
3
4
5
6
7
8
9
10
11
12
13
14
15
16
17
18
19
20
21
22
23
24
25
26
27
28
29
30
31
32
33
34
35
36
37
38
39
40
41
42
43
44
45
46
47
48
49
50
51
52
53
54
55
56
57
58
59
60
61
62
63
64
65
66
67
68
69
70
71
72
73
74
75
76
DruidUtilsTest
package org.iqqcode.DataSource;

import org.iqqcode.utils.JDBCUtils;
import org.junit.Test;
import java.sql.Connection;
import java.sql.PreparedStatement;
import java.sql.ResultSet;
import java.sql.SQLException;

public class DruidUtilsTest {
    @Test
    public void TestSelect() {
        Connection connection = null;
        PreparedStatement preparedStatement = null;
        ResultSet resultSet = null;

        try {
            //获取连接
            connection = DruidUtils.getConnection();
            String sql = "SELECT * FROM user WHERE  username = ?";
            preparedStatement = connection.prepareStatement(sql);
            preparedStatement.setString(1,"Sunny");
            resultSet = preparedStatement.executeQuery();

            while (resultSet.next()) {
                int id = resultSet.getInt("id");
                String userName = resultSet.getString("userName");
                String password = resultSet.getString("password");
                System.out.println("id : "+id+" \tusername : "+userName +"\tpassword : "+password);
            }
        }catch (SQLException e){
            System.err.println("数据库异常...");
            e.printStackTrace();
        }finally {
            JDBCUtils.closeResources(connection,preparedStatement,resultSet);
        }
    }

}
2
3
4
5
6
7
8
9
10
11
12
13
14
15
16
17
18
19
20
21
22
23
24
25
26
27
28
29
30
31
32
33
34
35
36
37
38
39
查询成功

# 5. JSON序列化
在 封装基础的工具方法CommUtils 时,它可以封装JSON序列化
JSON(JavaScriptObject Notation, JS 对象简谱) 是一种轻量级的数据交换格式。它基于ECMAScript(欧洲计算机协会制定的js规范)的一个子集,采用完全独立于编程语言的文本格式来存储和表示数据。简洁和清晰的层次结构使得 JSON 成为理想的数据交换语言。 易于人阅读和编写,同时也易于机器解析和生成,并有效地提升网络传输效率。 ---------《搜狗百科》
JSON : 字符串(直白点说就是人能看懂的字符串)
JSON序列化:将任意对象变为 Json字符串
JSON反序列化:将 Json字符串变为对象
通过
key : value的键值对来输出字符串
那么,我们来创建一个 User 类,通过封装工具类的方式来读取 User 中的属性值
和前面一样,我们创建一个类似CommUtils的 JsonCommUtils的工具方法来封装JSON序列化
User
package org.iqqcode.Model;


/**
 * @Author: Mr.Q
 * @Date: 2019-08-01 11:44
 * @Description:
 */

public class User {
    private Integer id;
    private String userName;
    private String password;

    public Integer getId() {
        return id;
    }

    public void setId(Integer id) {
        this.id = id;
    }

    public String getUserName() {
        return userName;
    }

    public void setUserName(String userName) {
        this.userName = userName;
    }

    public String getPassword() {
        return password;
    }

    public void setPassword(String password) {
        this.password = password;
    }
}
2
3
4
5
6
7
8
9
10
11
12
13
14
15
16
17
18
19
20
21
22
23
24
25
26
27
28
29
30
31
32
33
34
35
36
37
38
39
JsonCommUtils
package org.iqqcode.JsonUtils;

import com.google.gson.Gson;
import com.google.gson.GsonBuilder;


/**
 * @Author: Mr.Q
 * @Date: 2019-08-01 11:31
 * @Description:封装基础的工具方法,如加载配置文件、json序列化等
 */

public class JsonCommUtils {
    private static final Gson gson = new GsonBuilder().create();

    private JsonCommUtils(){ }

    // JSON序列化
    public static String object2Json(Object obj) {
        return gson.toJson(obj);
    }

    // JSON反序列化
    public static Object json2Object(String jsonStr,Class objClass) {
        return gson.fromJson(jsonStr,objClass);
    }
}
2
3
4
5
6
7
8
9
10
11
12
13
14
15
16
17
18
19
20
21
22
23
24
25
26
27
测试类JsonCommUtilsTest
package org.iqqcode.JsonUtils;

import org.iqqcode.Model.User;
import org.junit.Test;


/**
 * @Author: Mr.Q
 * @Date: 2019-08-01 11:31
 * @Description:
 */
public class JsonCommUtilsTest {

    @Test
    // JSON序列化
    public void gsonTest1() {
        User user = new User();
        user.setId(10);
        user.setUserName("test");
        user.setPassword("123");
        String jsonStr = JsonCommUtils.object2Json(user);
        System.out.println(jsonStr);
    }

    @Test
    // JSON反序列化
    public void gsonTest2() {
        String jsonStr = "{\"id\":10,\"userName\":\"test\",\"password\":\"123\"}";
        User user = (User) JsonCommUtils.json2Object(jsonStr,User.class);
        System.out.println(user);
    }
}
2
3
4
5
6
7
8
9
10
11
12
13
14
15
16
17
18
19
20
21
22
23
24
25
26
27
28
29
30
31
32


【参考文章】
